
I am honored to be part of this group that makes projects from Mister Domestic’s Playroom Party.
Fabric produced by Art Gallery Fabrics.
https://misterdomestic.net/2020/02/18/playroom-project-party
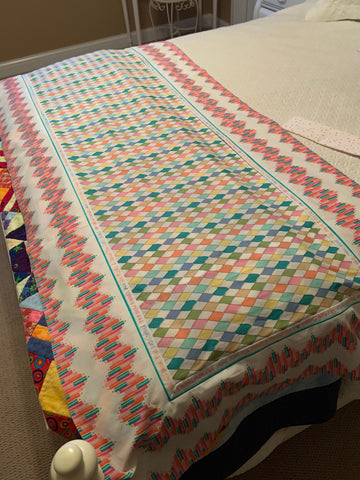
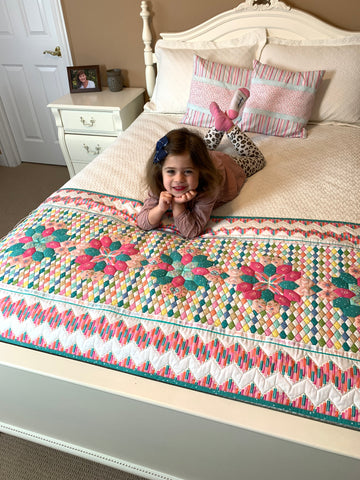
I made a coverlet for the Playroom Party Project.
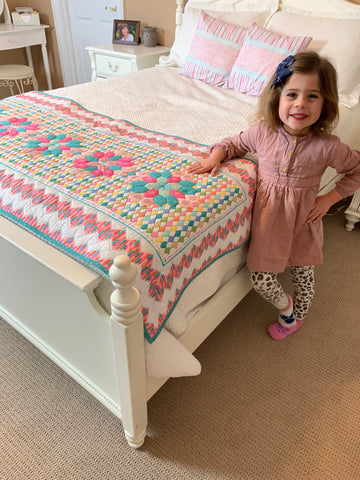
Meet my assistant/granddaughter, Reese.
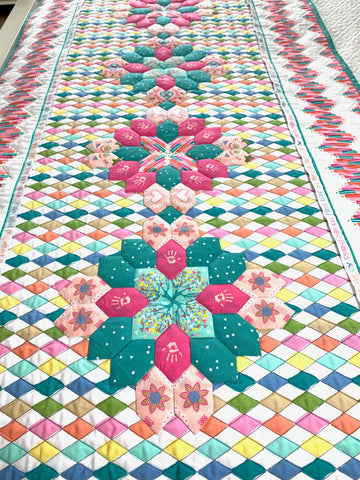
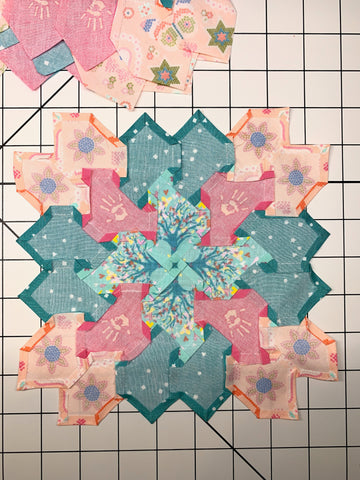
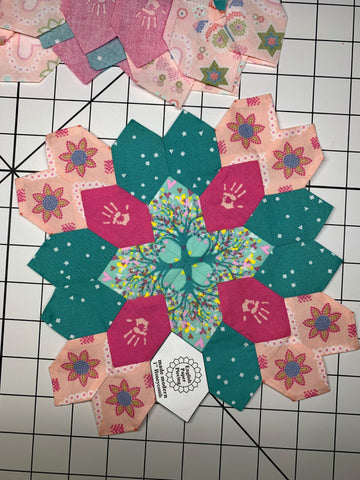
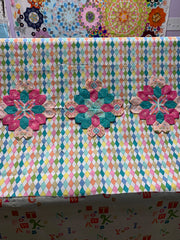
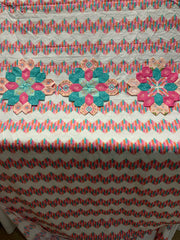
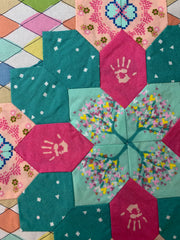
The blocks across the center of the coverlet are English Paper Piecing (EPP), Lucy Boston blocks.
These are English Paper Piecing Made Modern self-stick templates I designed to eliminate basting/gluing, whip-stitching and pulling paper, which is the traditional method for English Paper Piecing (EPP).
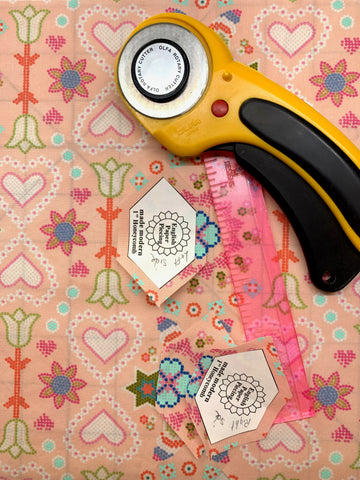
I am fussy cutting motifs. The one on top is lined up, ready to cut, with the help of Add A Quarter Ruler and a rotary cutter. The two on the bottom are already cut.
I am matching the motif in the middle of two honeycombs, so I need a right and left fussy cut, as noted on the templates.

The English Paper Piecing Made Modern templates enable you to straight stitch by hand or machine.
The templates are reusable until they no longer stick.
To be safe, I say 5-10 times. Some shapes I have reused way more than 10 times.

I turned the edges of the Lucy Boston blocks so I could appliqué them to the background fabric.
I designed Innovative Appliqué which makes appliqué easy for everyone.
One of my techniques is to use freezer paper on the front (right side) of your fabric vs traditionally used on the back (wrong side) of the fabric. No need to cut the back of your project to pull freezer paper out, once the appliqué has been stitched down.
In this case, the English Paper Piecing Made Modern stickers do the same job as freezer paper.
The sticker is on the front (right side) of the shape.
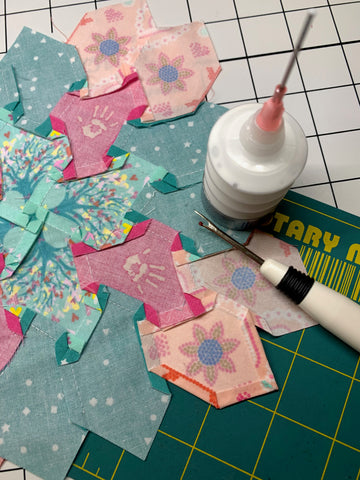
I use Roxanne's Glue Baste-It and a Clover seam ripper to turn down the edges of the block. Move the sticker to the next honeycomb shape and repeat.
Note: Roxanne's Glue Baste-It tacks faster than any other glue. You are not left holding the edge down until it dries, it dries immediately.
Big note: Buy the accordion bottle pictured here, much easier to apply than the round bottle and does not clog in the needle applicator.
Clover seam ripper as a turning tool? It ergonomically fits in your hand, the ripper part has a flat side that helps pull the cut edge towards the glue applied, a bit inside the fold line. Finger press that area down. The sticker on the front (right side) of the shape holds everything in place and only the cut edge turns down.
I know that is a lot, it is covered in detail in all the Innovative Appliqué books and patterns.
American Quilters Society offers my Innovative Appliqué as an online class on their iquilt platform.
The back of the block with the edges turned the Innovative Appliqué method.
Front of Lucy Boston block with the edges turned, ready to hand stitch to the background fabric.
I used the same sticker to turn all the shape's edges. Just move it from shape to shape.
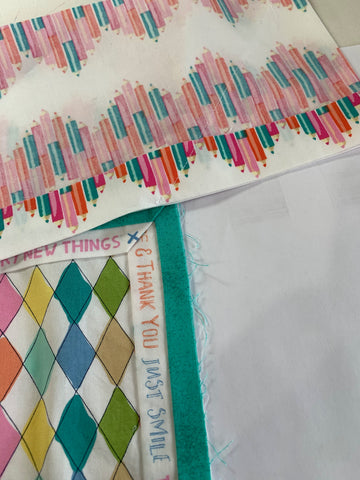
The flange with Thank You and Just Smile flips back to view words on the other side. The stripe is two rows of the words.
I cut 1/2" above and below the 2 rows of words, to have a little wiggle room.
Fold the strip between the lines of words and ironed it, then glued in place with Elmer's School Glue and steam iron. The turquoise accent trim is cut 1" wide, folded in half, ironed and glued in place.
Open up the turquoise accent trim and stitch on the fold line. That seam just stitched, secures both the turquoise trim and the flange with words.
The pencil fabric just wanted to be a border. I ironed along the tips of the pencils, to allowed the most white area to set off the pencils on the front side.
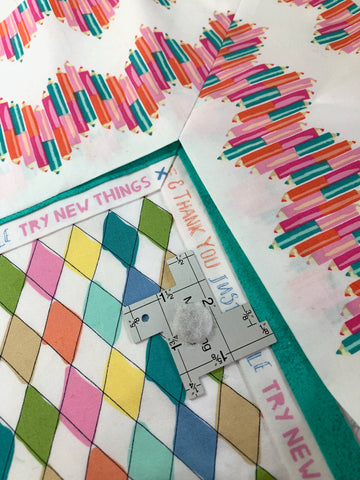
I want a 1/8" of the accent trim to show.
What is that fussy thing on the measure tool? It is a Velcro stick-on dot, the other half sticks to the side of my sewing cabinet to make this tool easy to find.
I glued the border in place and then flip it back and sewed on the fold line.
These are three background choices.
First picture, the blocks covered up too much of the letter fabric.
Middle picture, the diamond fabric creates a nice contrast in scale when quilted.
Third picture the pencil fabric, that just wanted to be a border.
Whoops, in the middle picture you are seeing the La Passacaglia quilt behind on my design wall.
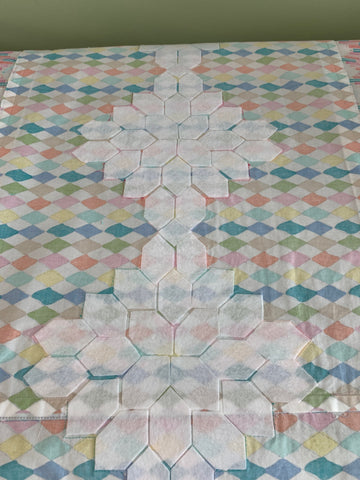
I put everything together before I appliquéd the Lucy Boston blocks.
It made it easier for me to make sure the coverlet was the right size and I could get the blocks centered.
I appliquéd the Lucy Boston blocks to the background fabric, now I like to add dimension to my appliqué.
Another Innovative Appliqué technique is to add super simple trapunto, to create that dimension.
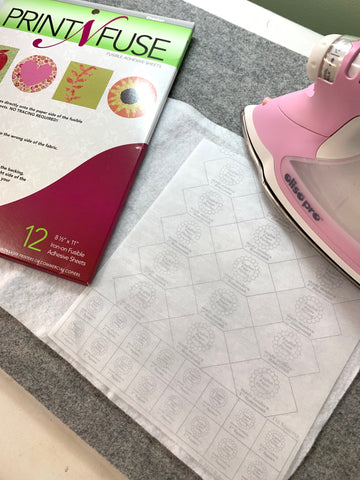
Copied one of the Lucy Boston template sheets to a sheet of Print N Fuse and ironed that Print N Fuse sheet to a piece of batting.
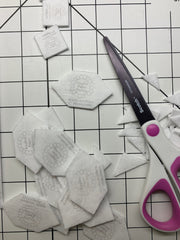
Cut shapes out and remove the paper backing to reveal a thin layer of fusible.
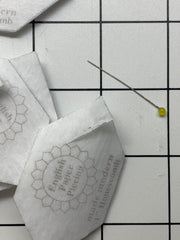
It is helpful to score the paper with a pin to remove the paper.
This is the wrong side of the project. Place the fusible side of the batted Print N Fuse shape against the wrong side of the background. Use the stitching lines from the appliqué block for placement and iron in place.
Place and iron one shape at a time, if doing more than one shape, they tend to move and get ironed in the wrong place.
(How do I know that?)
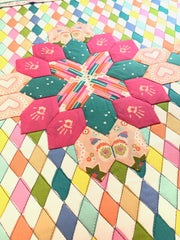
This is the appliqué without trapunto. The dimension with trapunto.
Review: The trapunto is placed on the wrong side of the background fabric, after the block (appliqué) has been stitched to the right side of the background fabric. The how-to is spelled out in all the Innovative Applique books and patterns.
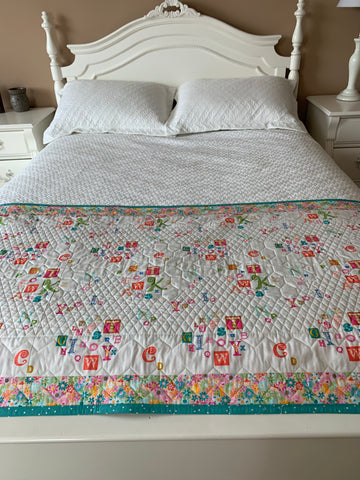
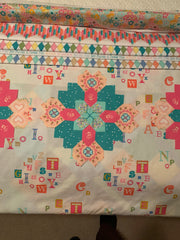
This is the back of the coverlet. The alphabet fabric with a border of the tiny flowers and the turquoise binding.
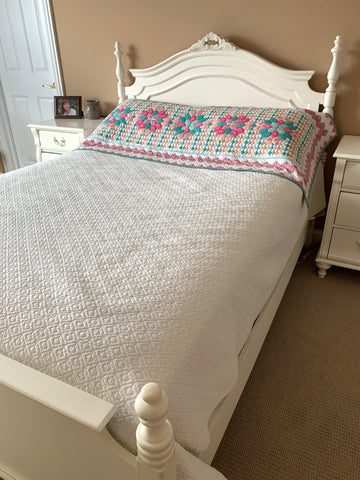
The coverlet can be used at the top of the bed.
I created a Free PDF for you. Coverlet Dimensions
Did you enjoy this post? Let's stay in touch. Sign up from my Newsletter.
Click on these icons and then follow me on these social media platforms.
![]()
![]()
![]()
![]()
My assistant and I thank you for visiting.
Becky and this time Reese
89 comments
TzdOqQoaHwCb
SwPCANvbLQ
TklWVHjYhfArg
OeDzvgQUwtnf
hBAufDcaoX