
Appliqué Made Easy
Sewforever’s mission is to help you confidently increase your quilting skills while making the most of your creative time.
Innovative Appliqué introduces you to time-saving tips and techniques for appliqué.
Turned-edge appliqué made easy.
No tracing, needle-turn, or cutting freezer paper from the back of your project.
Achieve precise results without hours or years of practice.

This pattern is the Sew Simple Series.
I fell in love with a set of patterns for (4) round seasonal table toppers.
I did not know how to appliqué and wanted it to be turned edge appliqué.
I needed to learn turned edge appliqué.

I took many appliqué classes. But my results left a lot to be desired.
All kinds of things slowed me down.
Needle turn was going to take a long time to master.
Freezer paper offered the best control over fabric shapes, but the tiny iron method was dangerous.
Cutting freezer paper out of the back of my work was an accident waiting to happen.
I lay awake at night thinking of ways to work around those tasks.
Why trace when we can copy and print?
Why iron freezer paper to the wrong side of the fabric, stitch it down, then cut it out?
I will spare you more whys and show you the techniques I developed to eliminate those whys.
Innovative Appliqué developed from my nighttime wandering.
I want you to feel confident and enjoy turned edge appliqué.
Don't gasp, deep breaths, it is possible.
Even experienced quilters say these techniques improve their progress.

Let's create a placement guide.
There is no need to trace a vinyl placement guide.
Place a sheet of Perfect Piecing in the copier's paper tray.
Place your pattern on the copier and press print.
You just created a placement guide.
Copy and print in sections if your pattern is larger than 8-1/2" x 11".

Let's create appliqué templates.
Lay a sheet of heavy-weight freezer paper in your copier's paper tray.
Place your pattern on the copier and press print.
Instant templates, no tracing.
My patterns are designed with Pattern A (overlay) and Pattern B (templates).
I separate the shapes, number them in the order they go down on the right side of the background fabric, and mark dash lines in areas that lay under another shape.
That does not mean you must use only my patterns, although I would love that.

Cut the freezer paper shapes out on the solid lines, except for the dashed areas.
Dashed areas lay under another shape.
Leave extra freezer paper to remember to trim extra fabric.

Iron the freezer paper templates to the right side of your fabric.
That is how we avoid cutting freezer paper out of the back.

Trim a 3/16" turn allowance. That sounds technical, but it is not; 4/16" is a 1/4".
You want it to be slightly less than 1/4" to make it easier to turn the cut edge down.
At the dashed lines, trim extra fabric in those areas, 1/4"- 1/2".
It is not necessary to measure; it is an estimated guide.
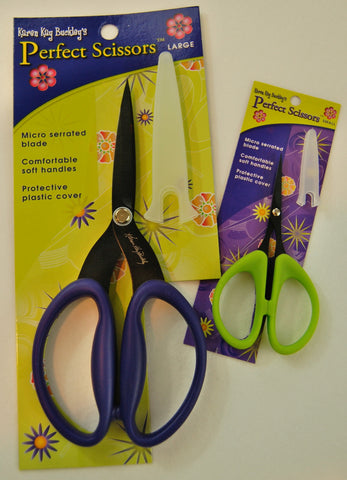
These scissors are the bomb.
Most people trim small shapes with tiny scissors, resulting in choppy cuts.
I trim out the fabric shapes with purple scissors.
They have one serrated blade that pulls the fabric to your cut vs pushing it away.
So, you are cutting exactly where you intended.
The serrated blade also helps keep the fabric cut from fraying.
Plus, the handle design does not fatigue your hands.

Roxanne's Glue Baste-It is a water-soluble glue (it washes out).
It tacks faster than any glue I have tested. I do not want to wait for the glue to take hold and slow me down. I can not out-turn this glue, and I can turn pretty fast.
The ergonomic bottle design eliminates hand fatigue and makes applying just the right amount of glue easy.
This glue has been on the market for years. If you have an old bottle that is continually clogged, this new design eliminates that problem. You can refill this bottle with your previous purchase by carefully removing the pink part and refilling. Although you will use so little glue, it will take a long time to use up this bottle.

You have trimmed the fabric shape, and now apply a thin line of glue.
This line looks pretty thick, the picture is magnified, think half that.
The best turning tool I have found is a Clover seam ripper.
It has a flat side that aids in turning the fabric down.
The freezer paper (see it peeking out) is on the right side of your fabric, holding the fabric shape, and only the cut edge will turn down.
Most people tend to hold the seam ripper down low and try to scope the fabric over.
Work from above. Hold the seam ripper like a pencil and pull the cut edge towards the glue.
Turn the cut edge over with the Clover seam ripper and press in place with your finger.
Turn and finger press, working your way around the shape.
Do not turn dashed areas.

The tool on top is an awl, typically used in appliqué.
The long pointed part is round and tends to slip off when pulling the fabric over.
It is suitable for holding a point in place but not so much for turning.
The tool below is a seam ripper, as you know.
I call out this particular seam ripper because it ergonomically fits in my hand.
Are you sensing a theme? At my age, or any age, the more comfortable you can work, the more enjoyable.

Recognize this?
It's a different pattern, but you get it.
It is a Perfect Piecing placement guide printed from whatever pattern you use.
Pin it to the right side of your background fabric, as pictured.
You want it to open like a book, requiring only two pins on the left side.
Apply a little Roxanne's glue to the wrong side of the turned edge shape.
Slide the shape under the placement guide, position, and finger press in place.
Drum roll.
Now, carefully pull the freezer paper off the shape you just glued.
No cutting freezer paper out of the back of your work.
Do not stitch anything at this point.
The glue holds everything in place. No pins are needed, and no thread tangling on the pins.
Continue placing all the shapes in the same manner.

When all the shapes are in place, unpin the placement guide.
Now, you are ready to stitch.

Knot your thread and stitch up through the background fabric.
Your knot will be on the wrong side of the background fabric.
Stitch back down, catching the background fabric a bit under the edge of the shape.
Stitch back up into the fold of the shape, and continue stitching all the shapes down.
Congratulations, your appliqué is complete!
Want to know a super simple trapunto technique?
This is how it works.
Feel free to skip this step. It is optional.

I wanted to create dimension but found traditional trapunto overwhelming.
So, I developed a workaround to make it easy.
Copy Pattern B, which you used to make the templates, to a Hotfix Adhesive Sheet.

Iron the printed sheet of Hot Fix Adhesive Sheet to a piece of low loft batting.
Low loft means not fluffy batting.
My favorite batting is Dream Cotton, but use what you have.
If you iron to polyester batting, you may need a pressing cloth so it doesn't stick to your iron.
This time, cut the shapes out a bit inside the solid line, including the dashed areas.
We want the shapes to fit inside our stitching lines on the wrong side of the background fabric.

This is a cut shape; remove the thin layer of paper to reveal the fusible.
Please ignore the piece of webbing in the picture.
This is the best picture of removing the paper from a shape.
The fusible side of the shape goes against the wrong side of your background fabric.
Position the fusible shape inside the corresponding stitching lines.
Iron in place.

See how that works?
The fusible side is ironed to the back of your project.
Iron one shape at a time.
If you lay them all down at once, they tend to move and do not end up inside the stitching line.
Now add a regular layer of batting, backing, and quilt as desired.
Quilt the background/overall quilting first to stabilize the project.
Then stitch in the ditch to lock the batting under the shapes in place and create the dimension.

Can you see the dimension?
The batted shapes are not put under the individual appliqué pieces.
They are ironed to the back of your project after you have stitched everything down.
I am repeating that because this method is counterintuitive.
Thank you for taking the time to read this post. I hope I have inspired you.
All my patterns include picture directions similar to or similar to what you see in this post.
I do not want you to figure out what I am trying to explain when I can show you a picture.
To browse my patterns, visit Sewforever.
Feel free to share this post on social media or with your friends.
I do love comments and questions.
I created an On-Demand Innovative Appliqué class to offer you a hands-on experience.
I cover time-saving techniques for two hours, resulting in precise results without hours or years of practice.
This class covers my entire process: bonus sections, turning small circles, and creating perfect round eyes.
Visit my YouTube channel, where I share time-saving tips to share.
Thank you,
Becky